
Want to record live IPTV and never miss your favorite shows? With TiviMate Premium, you can turn your device into a powerful IPTV DVR. This guide will walk you through everything from choosing your storage location to scheduling and managing recordings in TiviMate.
Don’t have TiviMate Premium yet?
- Install TiviMate Premium with this step-by-step guide
- Try our TiviMate Xtreme HD IPTV Edition – includes Premium and pre-configuration
Step 1: Set Up Your Recording Storage
- Launch TiviMate and Go to Settings:
- Open TiviMate and click the gear icon to enter the Settings menu.
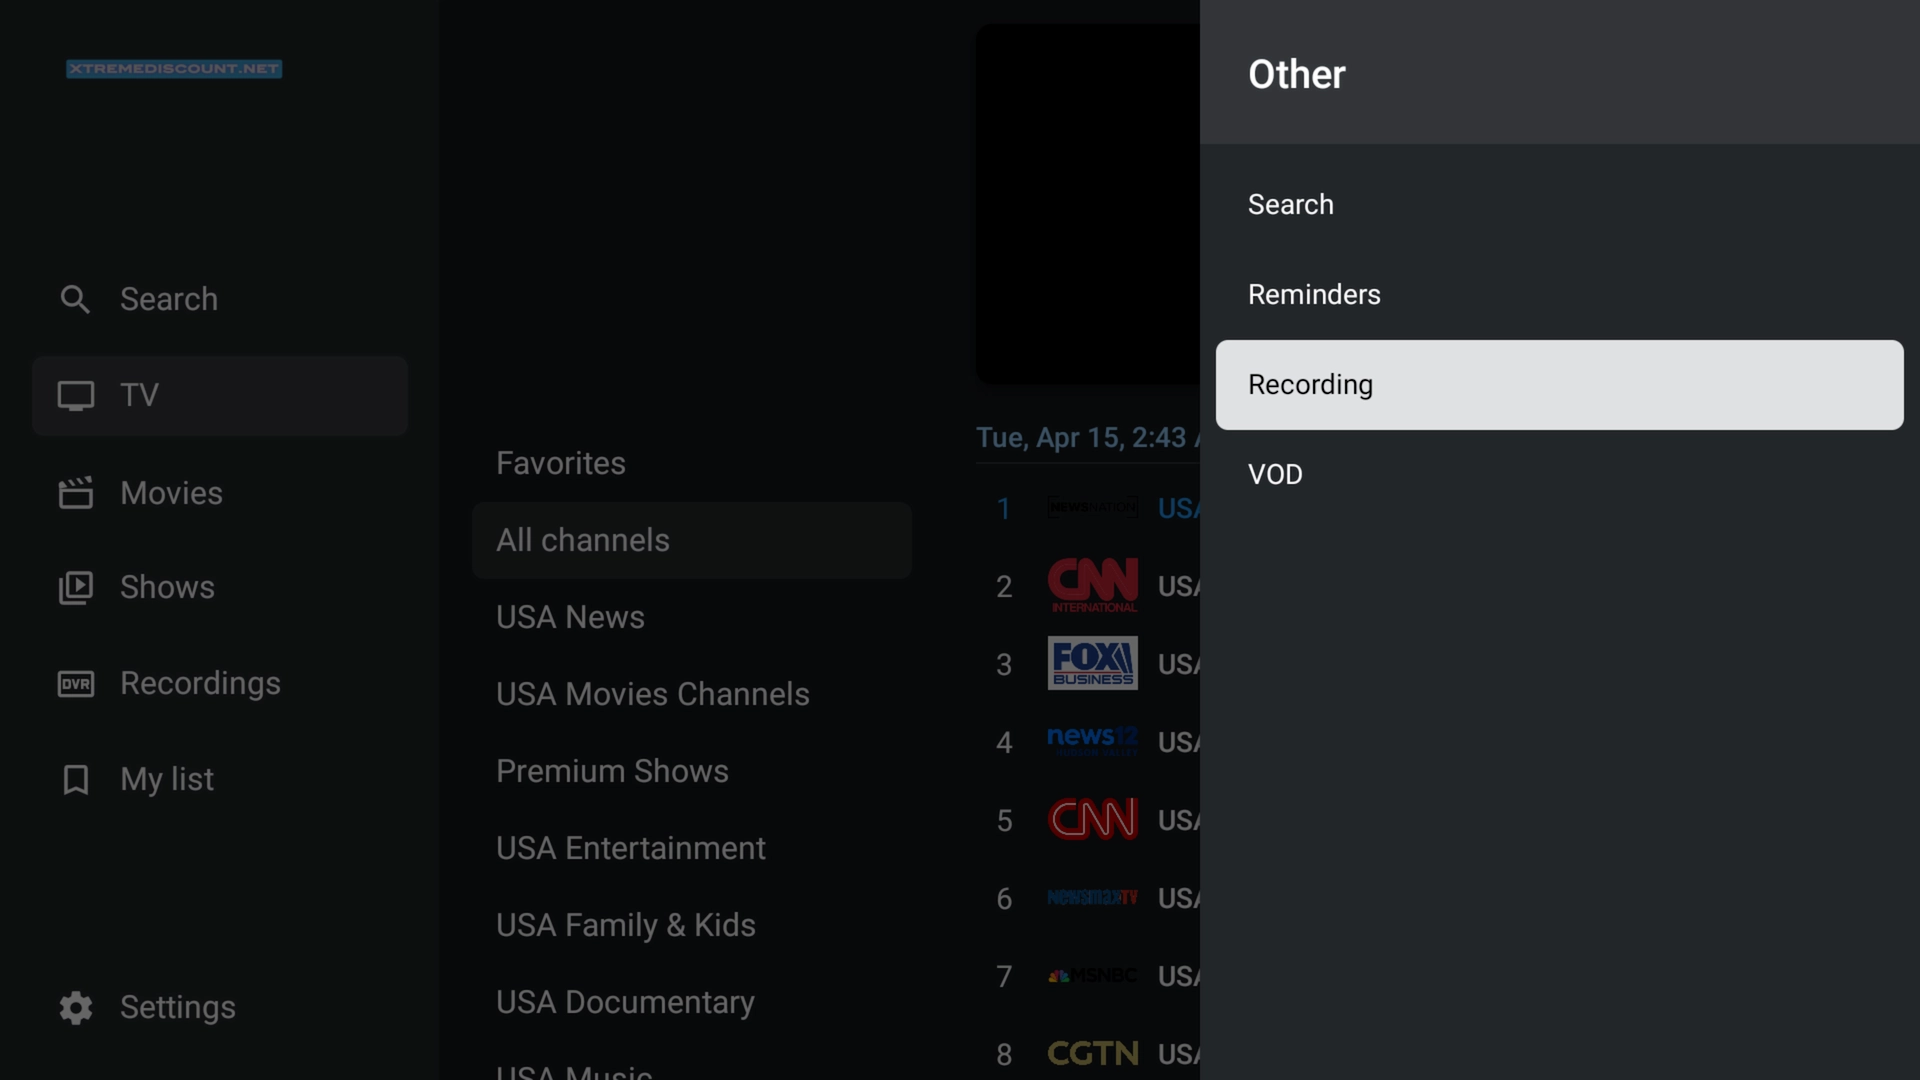
- Select “Recording”:
- Scroll down and choose the Recording option.
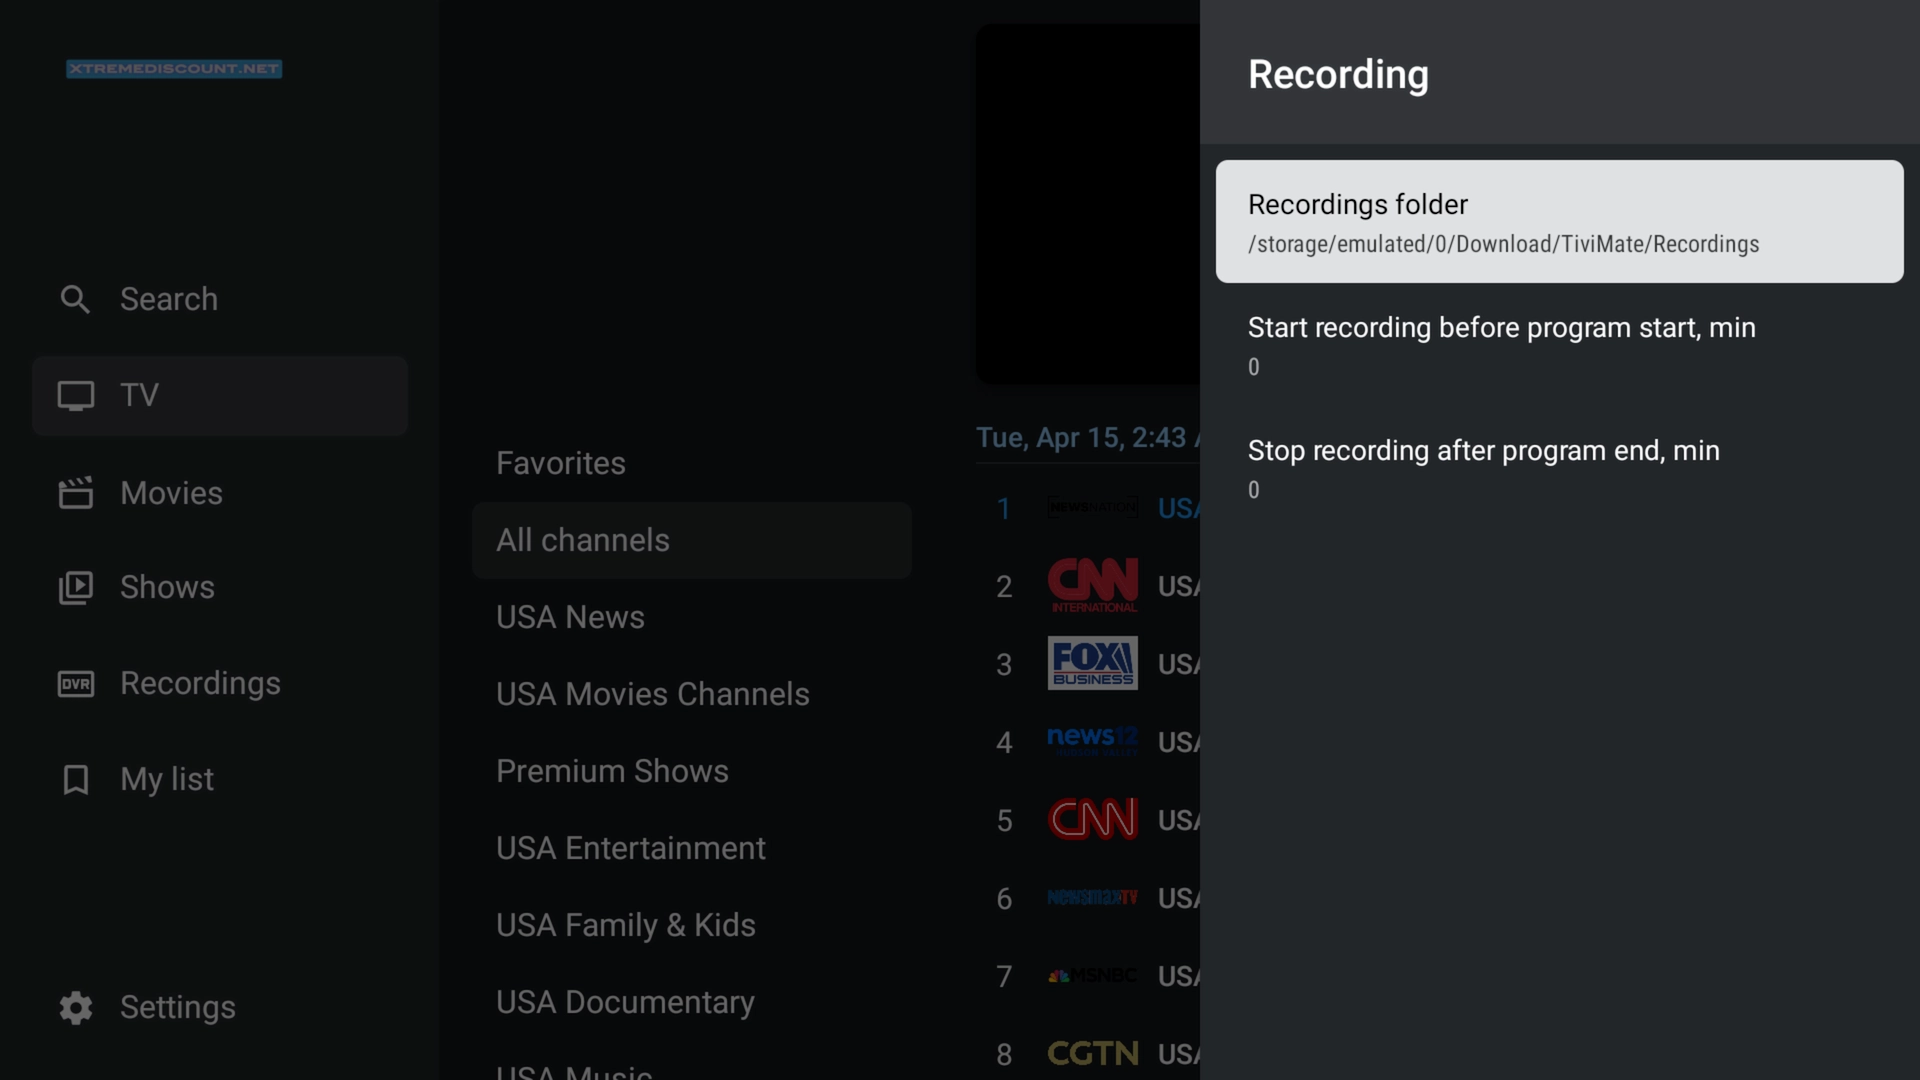
- Choose Recording Folder:
- Select Recording folder and choose a storage location with enough space.
- We recommend an external USB drive or OTG-connected flash drive if using Firestick or Android devices.
- Enable Background Recording (Optional):
- Enable Background recording so TiviMate can record while you’re watching something else or the app is in the background.
Step 2: Record a Show or Channel Manually
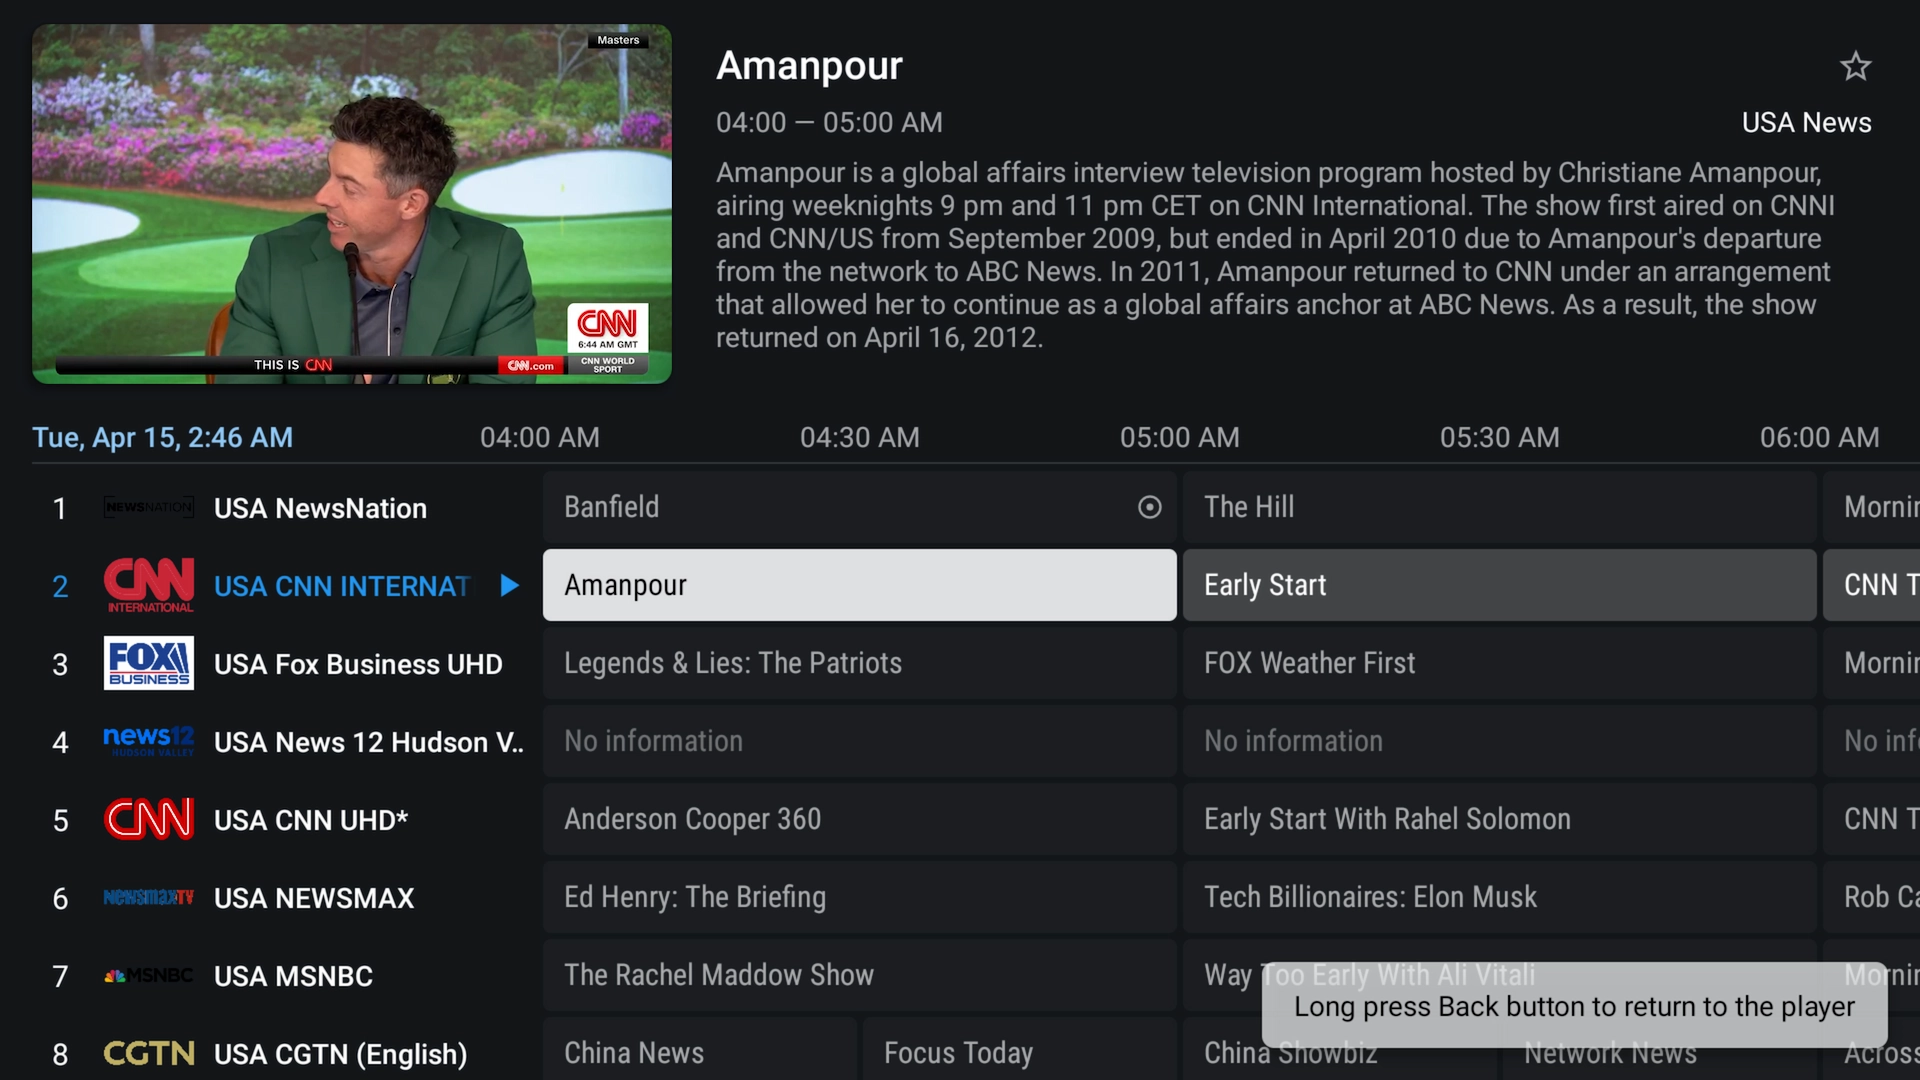
- Open the EPG (TV Guide):
- Navigate to the channel guide and select the show or event you want to record.
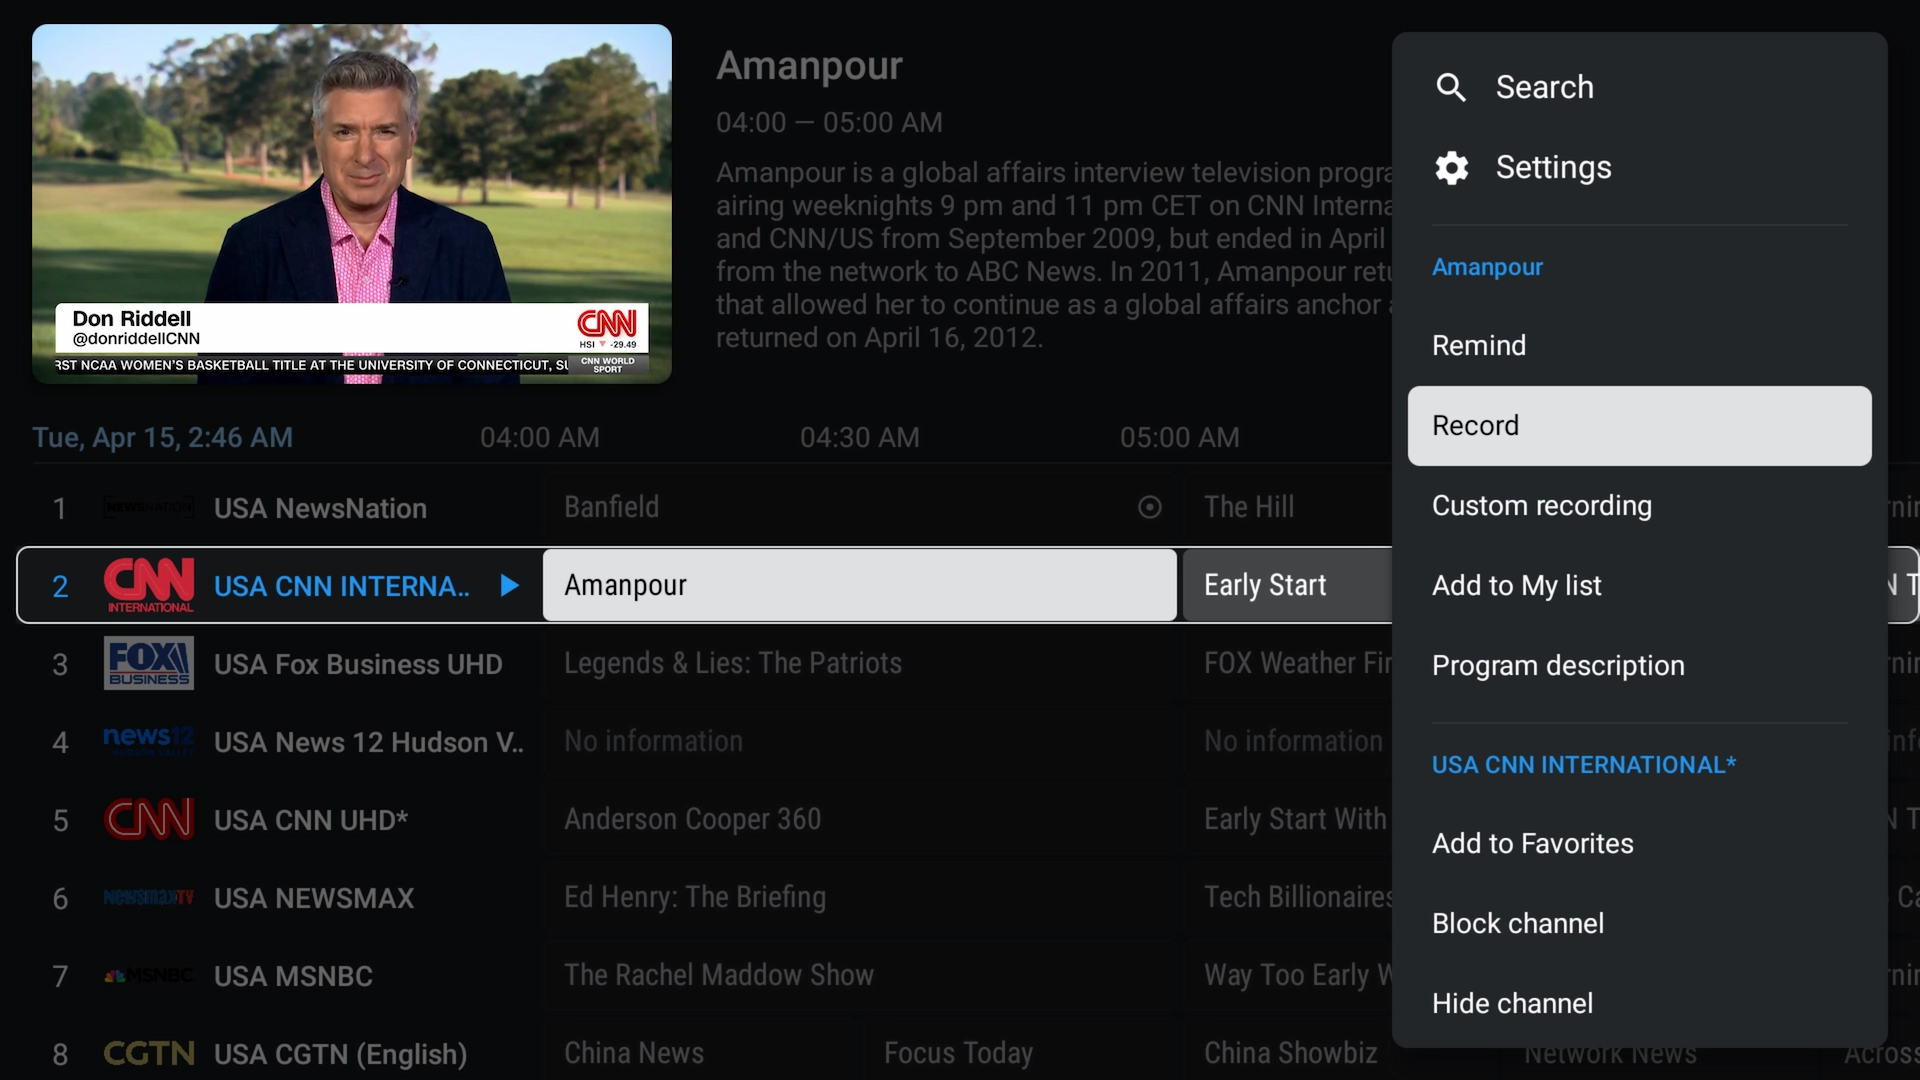
- Start Recording:
- Hold the OK/Select button on your remote until the options menu appears, then select Record.
- Recording in Progress:
- The show will record to your selected folder and display a red dot icon to indicate it's being recorded.
Step 3: Schedule Recordings
- Navigate to the Program Guide:
- Scroll through upcoming shows in the EPG.
- Set a Scheduled Recording:
- Long press on a future show and select Record from the menu.
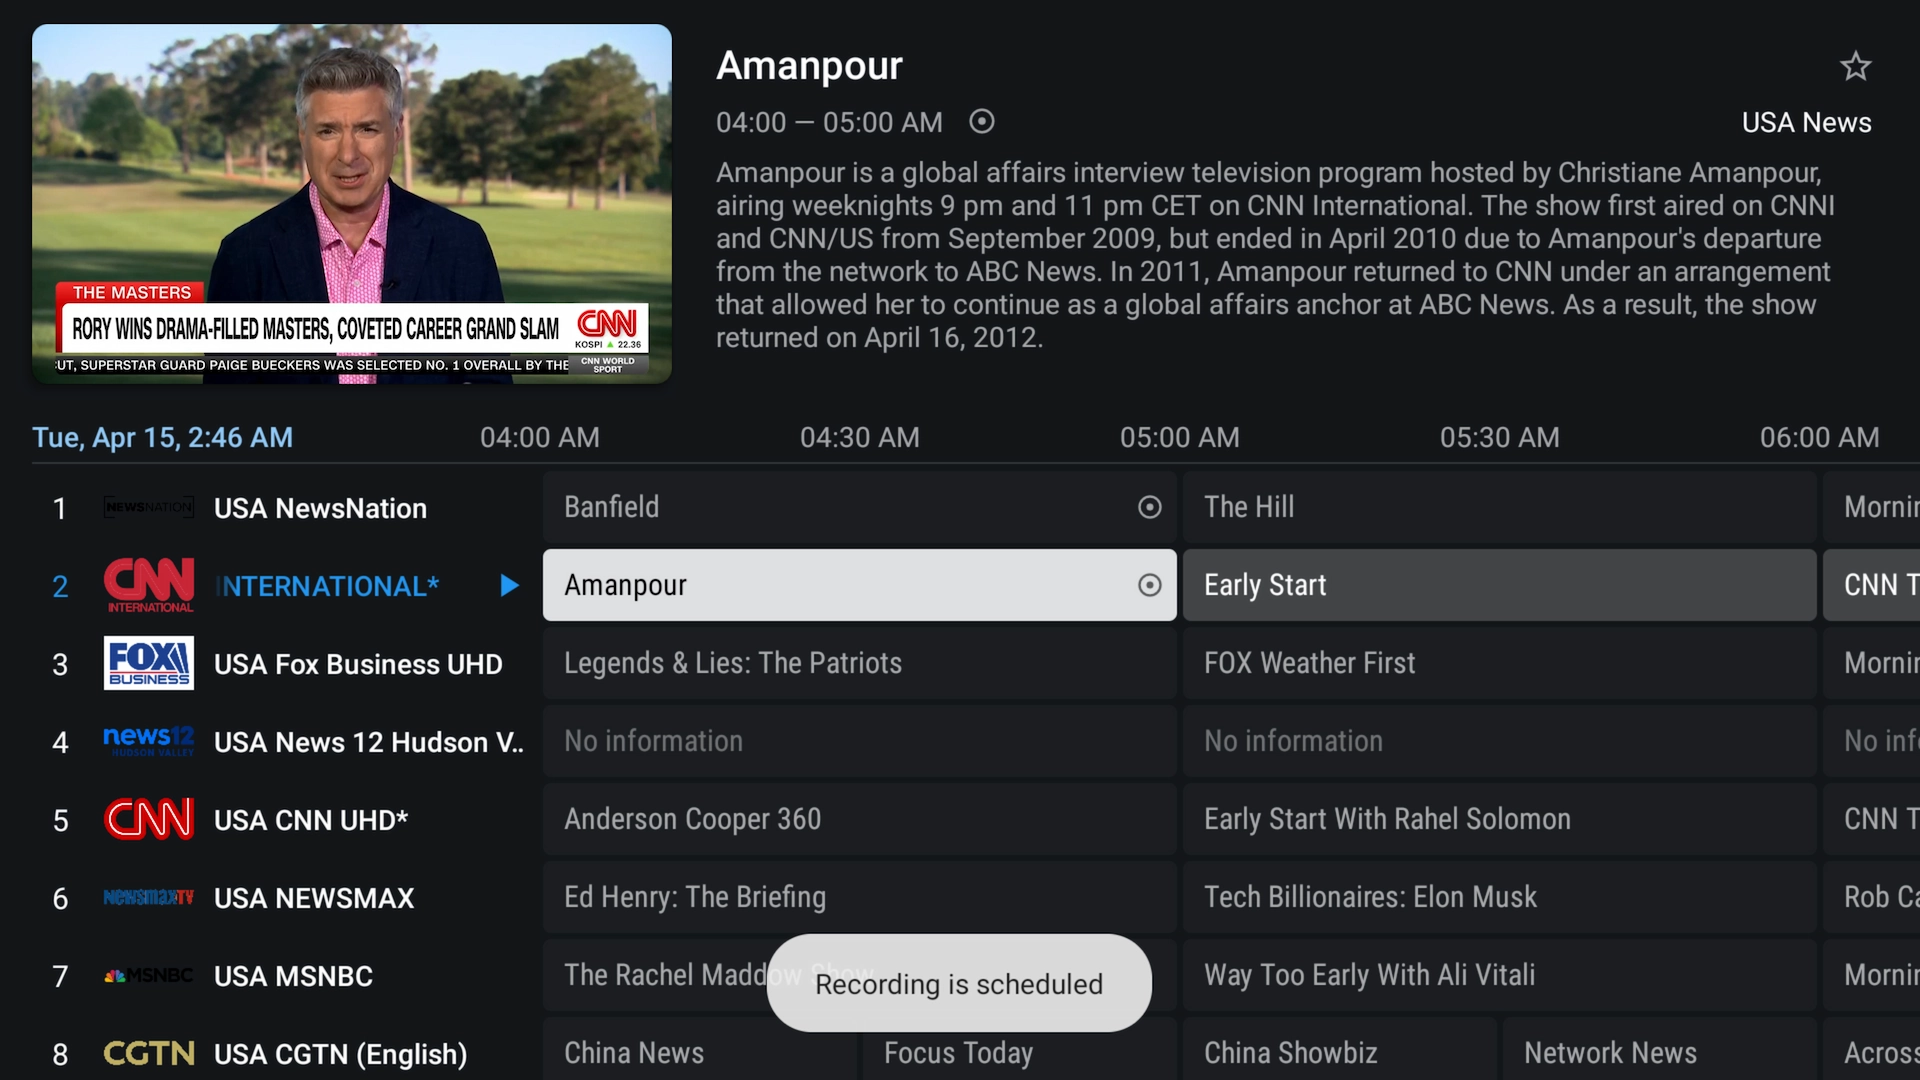
- View Scheduled Recordings:
- Go to Settings > Recording > Scheduled recordings to view or manage them.
Step 4: Watch or Manage Recordings
- Access Your Recordings:
- From the home screen or side menu, go to Recordings.
- Play or Delete:
- Select any recorded program to play it, or press and hold to bring up the option to delete.
- Free Up Space:
- Remember to delete old recordings regularly to avoid running out of storage space.
Tips for TiviMate DVR Setup
- Use External Storage: Internal storage can fill up fast. Use a USB drive or SD card for recordings whenever possible.
- Enable Background Recording: Let recordings happen while watching other content or using other apps.
- Update EPG: Keep your EPG refreshed to ensure accurate scheduling of shows and events.
- Label Recordings: Files are saved using the channel and time; you can rename them manually if needed for clarity.
Frequently Asked Questions (FAQs)
Do I need TiviMate Premium to use the DVR feature?
Yes, DVR and recording features are only available in the Premium version of TiviMate.
Where are my recordings saved?
Recordings are saved to the folder you selected in Settings > Recording > Recording folder. Use external storage for better performance.
Can I record from multiple playlists?
Yes, but only from the currently selected playlist. You can switch playlists to schedule recordings from different services.
Why did my recording fail?
Make sure your storage has enough free space and that your device isn’t restricted from writing files. Also, confirm the playlist allows recording.
Conclusion
TiviMate DVR turns your IPTV player into a digital recorder, giving you the power to schedule and rewatch your favorite programs on your terms. Whether it’s live sports, movies, or shows, with the right setup, you’ll never miss a thing.
Need a top-tier IPTV service to go with your TiviMate DVR setup? Try Xtreme HD IPTV today and get 20% off your subscription! Free 36 hour trial as well!
