
TiviMate DVR Setup: Record IPTV with TiviMate Premium
With TiviMate Premium, your Android device becomes a powerful IPTV DVR. This guide walks you through selecting storage, recording live TV manually or on a schedule, and managing your saved shows—all in TiviMate. Try Xtreme HD IPTV free for 36 hours and unlock seamless DVR functionality.
Table of Contents
- Prerequisites
- 1. Configure Recording Storage
- 2. Record Live TV Manually
- 3. Schedule Automated Recordings
- 4. Access & Manage Recordings
- Tips for DVR Success
- Frequently Asked Questions
- Conclusion
Prerequisites
- TiviMate Premium: DVR features require Premium edition.
- Storage Device: Internal space or an external USB/OTG drive with sufficient capacity.
- Active IPTV Playlist: M3U URL or Xtream Codes API already configured.
1. Configure Recording Storage
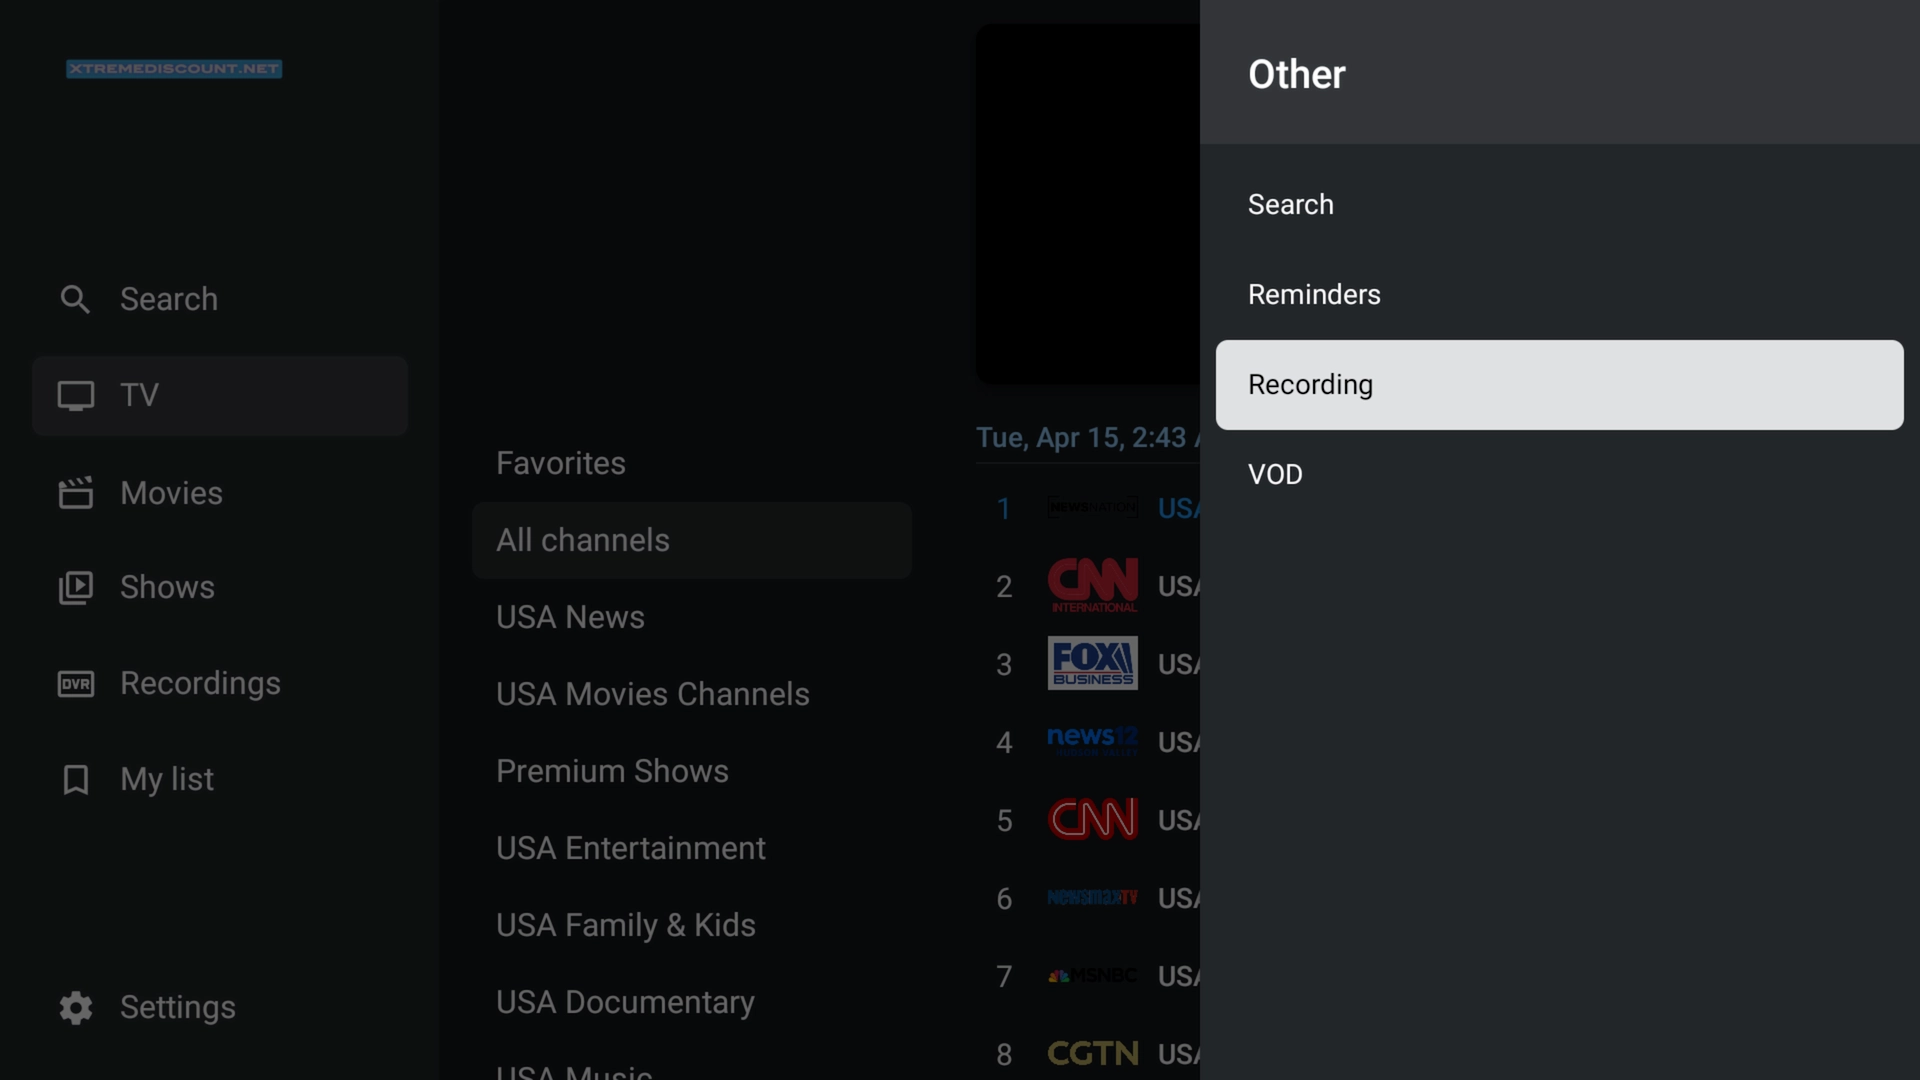
- Open Settings > Recording
- Launch TiviMate, click the gear icon, and select “Recording.”
- Choose Recording Folder
- Select a folder on internal storage or an attached USB/OTG drive with ample free space.
- Enable Background Recording (Optional)
- Allow TiviMate to record in the background while you watch other content.
2. Record Live TV Manually
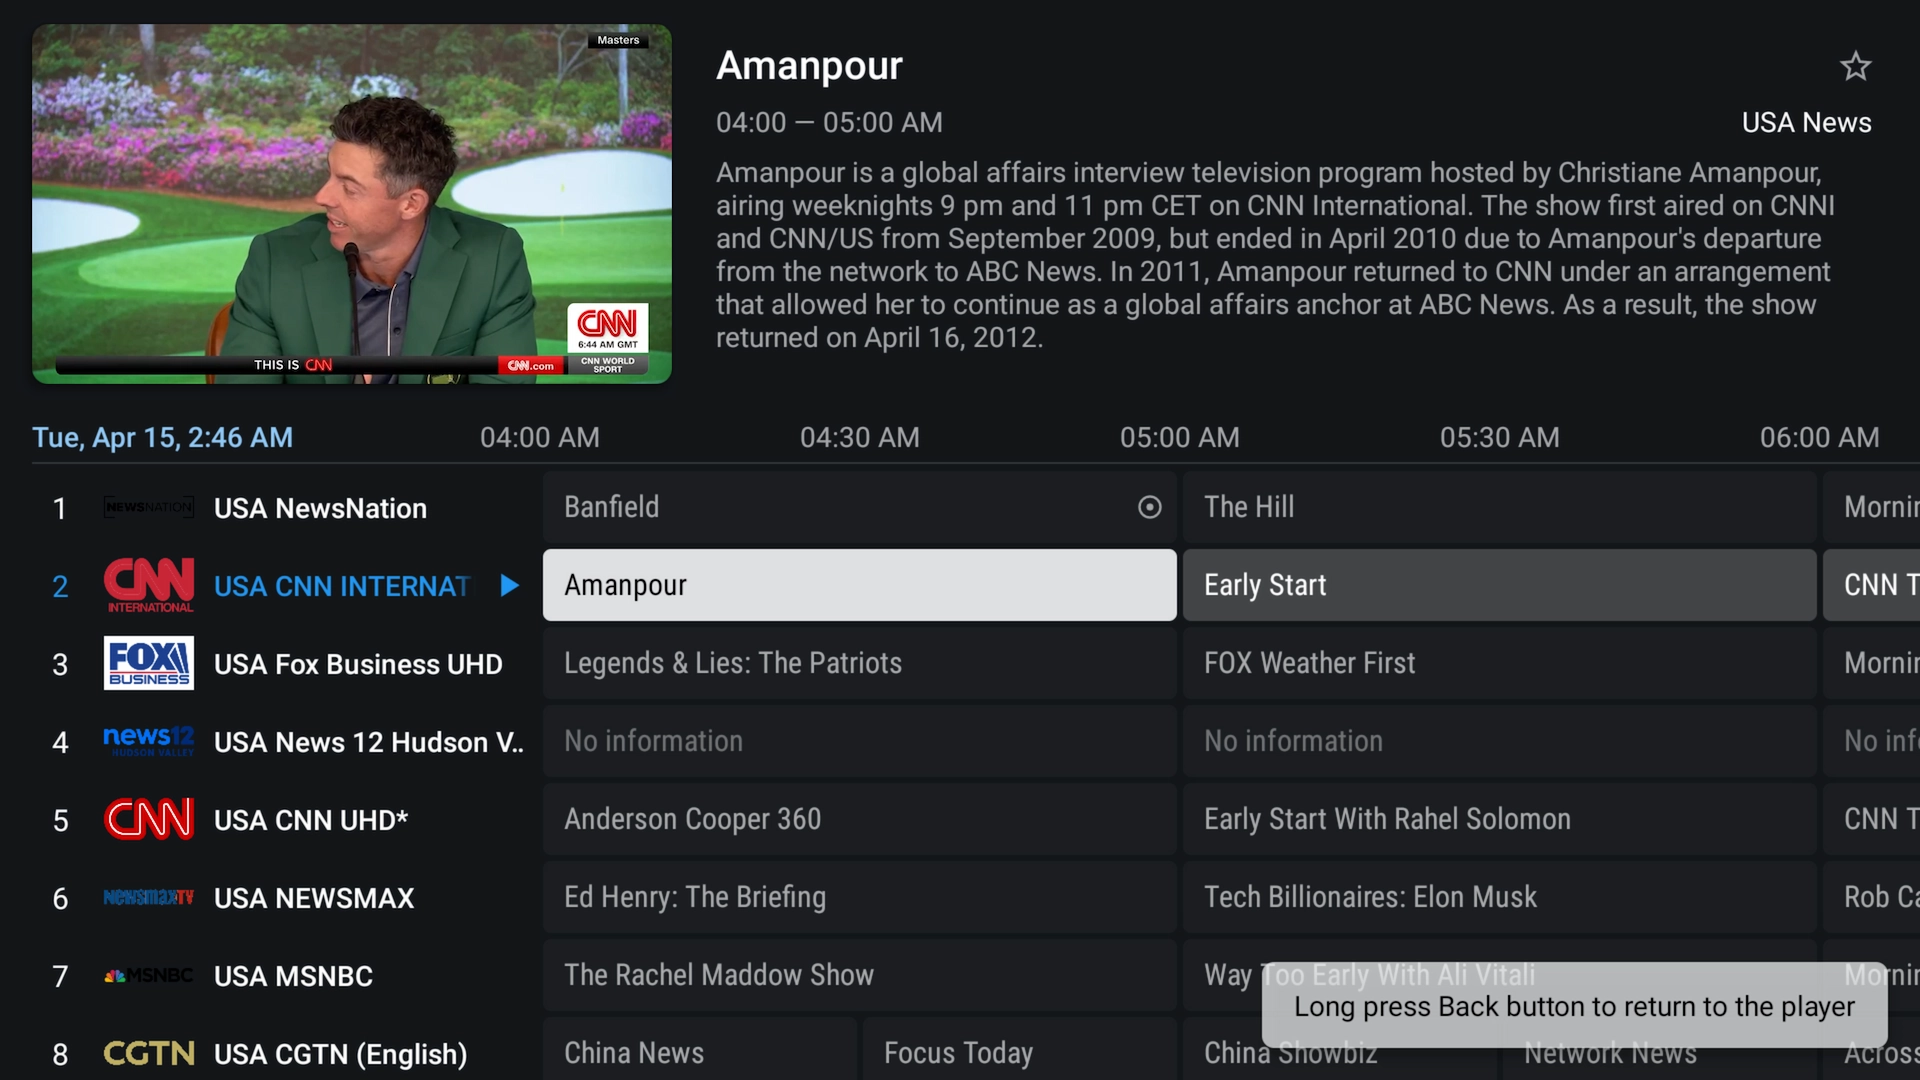
- Open the EPG (Guide)
- Navigate to your channel guide and highlight the live program.
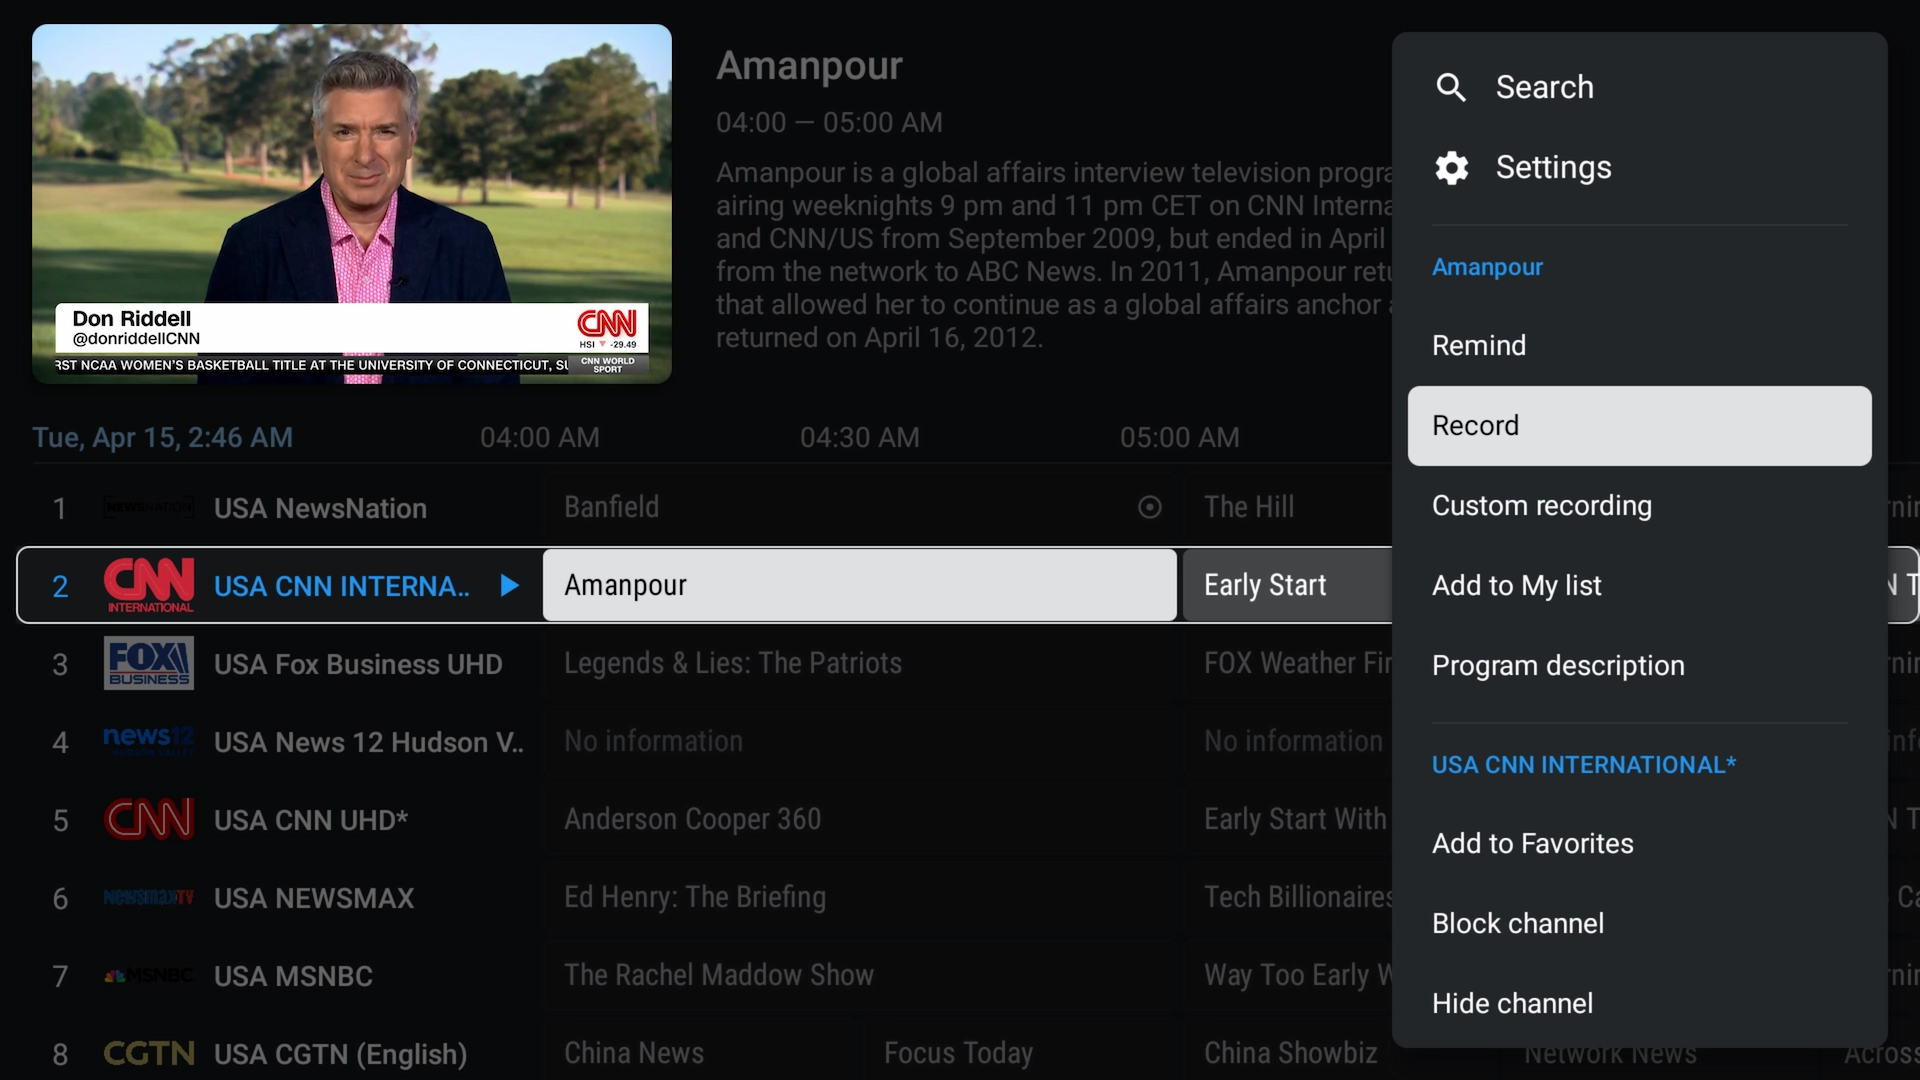
- Start Recording
- Long-press OK/Select on the program, then choose “Record.” A red dot appears indicating recording is in progress.
3. Schedule Automated Recordings
- Browse Upcoming Shows
- Scroll through the EPG to find a future program.
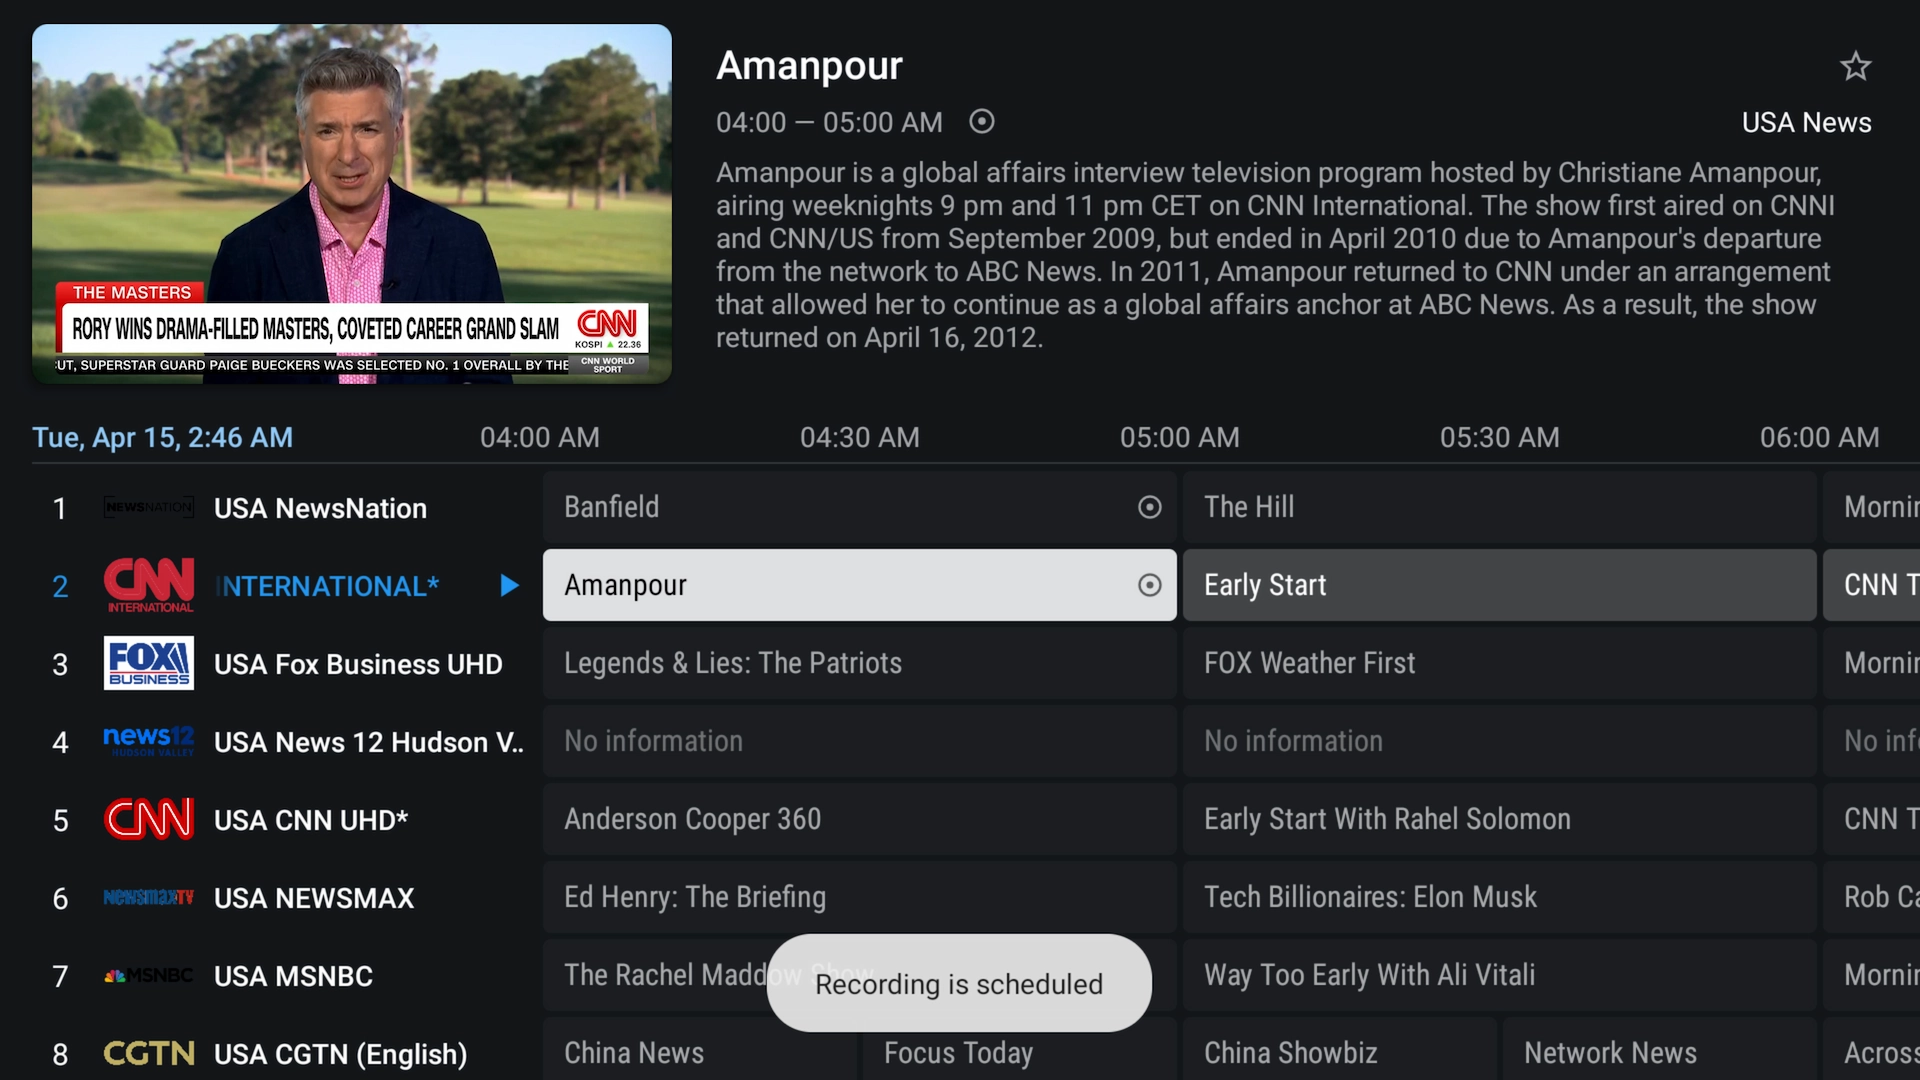
- Set Recording
- Long-press OK/Select on the future show and choose “Record” to schedule it.
- View Scheduled Recordings
- Go to Settings > Recording > Scheduled Recordings to edit or cancel jobs.
4. Access & Manage Recordings
- Open Recordings
- From the main menu, select “Recordings.”
- Play or Delete
- Tap any recording to play. Long-press to delete and free up space.
- Monitor Storage
- Regularly remove old files to prevent storage from filling up.
Tips for DVR Success
- Use External Storage: USB/OTG drives preserve internal memory and handle large recordings.
- Keep EPG Updated: Refresh playlists under Settings > Playlists to ensure accurate guides.
- Label Recordings: Rename files after recording for easy identification.
- Backup Settings: Export your configuration to restore quickly after reinstalling.
Frequently Asked Questions
- Do I need Premium for DVR?
- Yes—recording and scheduling are exclusive to TiviMate Premium.
- Where are recordings saved?
- In the folder you selected under Settings > Recording. External drives are recommended.
- Can I record multiple channels?
- Yes, you can switch playlists and schedule recordings on different channels—but simultaneous background recordings are limited by device performance.
- Why did my recording fail?
- Ensure sufficient free storage, correct playlist permissions, and that your device can write to the chosen folder.
Conclusion
Setting up DVR in TiviMate transforms your IPTV setup into a personal recording studio. Follow these steps to configure storage, record live TV, schedule shows, and manage your library effortlessly. For the best IPTV service with built-in EPG support and 99.9% uptime, sign up for a free 36-hour trial of Xtreme HD IPTV and enjoy seamless recordings today!
